Camera settings
This article will explain how to set the correct camera settings for Broadcast Arena
Instructions
First log in to the cameras webinterface. You reach the web interface by browsing to the cameras IP-address in Internet Explorer.
Then go to Configuration > Video/Audio
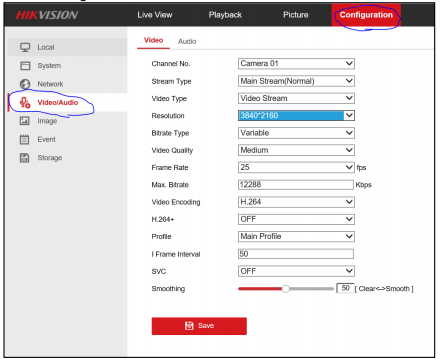
Video settings
Set image stitching to original, Configuration > System > System Settings > Image Stitching
Set the correct resolution, it should be 3072*1728 and press save.

Do this for all 4 cameras.
Audio settings (only camera 01)
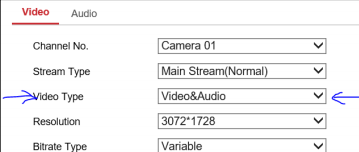
Change video type to “Video&Audio”
In the audio tab set the audio encoding to “MP2L2”
The sampling rate to “48kHz”
The Audio stream bitrate to “128kbps”
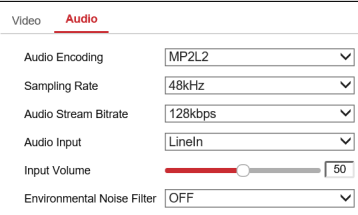
Here you can also adjust the input volume.
Exposure settings and image adjustment (Only camera 01, the other cameras will follow camera01s settings)
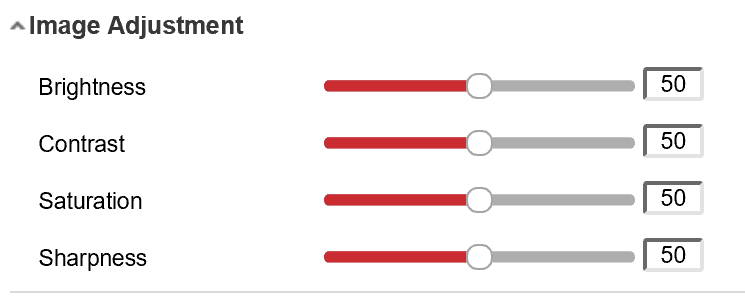
To set the exposure go to the Image tab and under display settings > Image Adjustment you got brightness. Change this setting so the ice or pitch is visible and not overexposed.
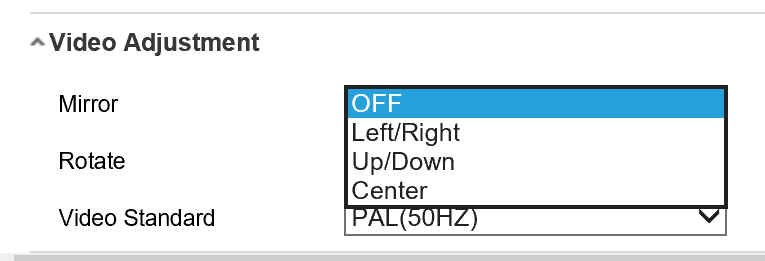
If the camera is mounted in a way that the image is mirrored you will have to adjust the “mirror” setting under the “Video Adjustment” tab to “Center”
Remove OSD
If the camera got OSD enabled you will have to disable it under “OSD Settings”
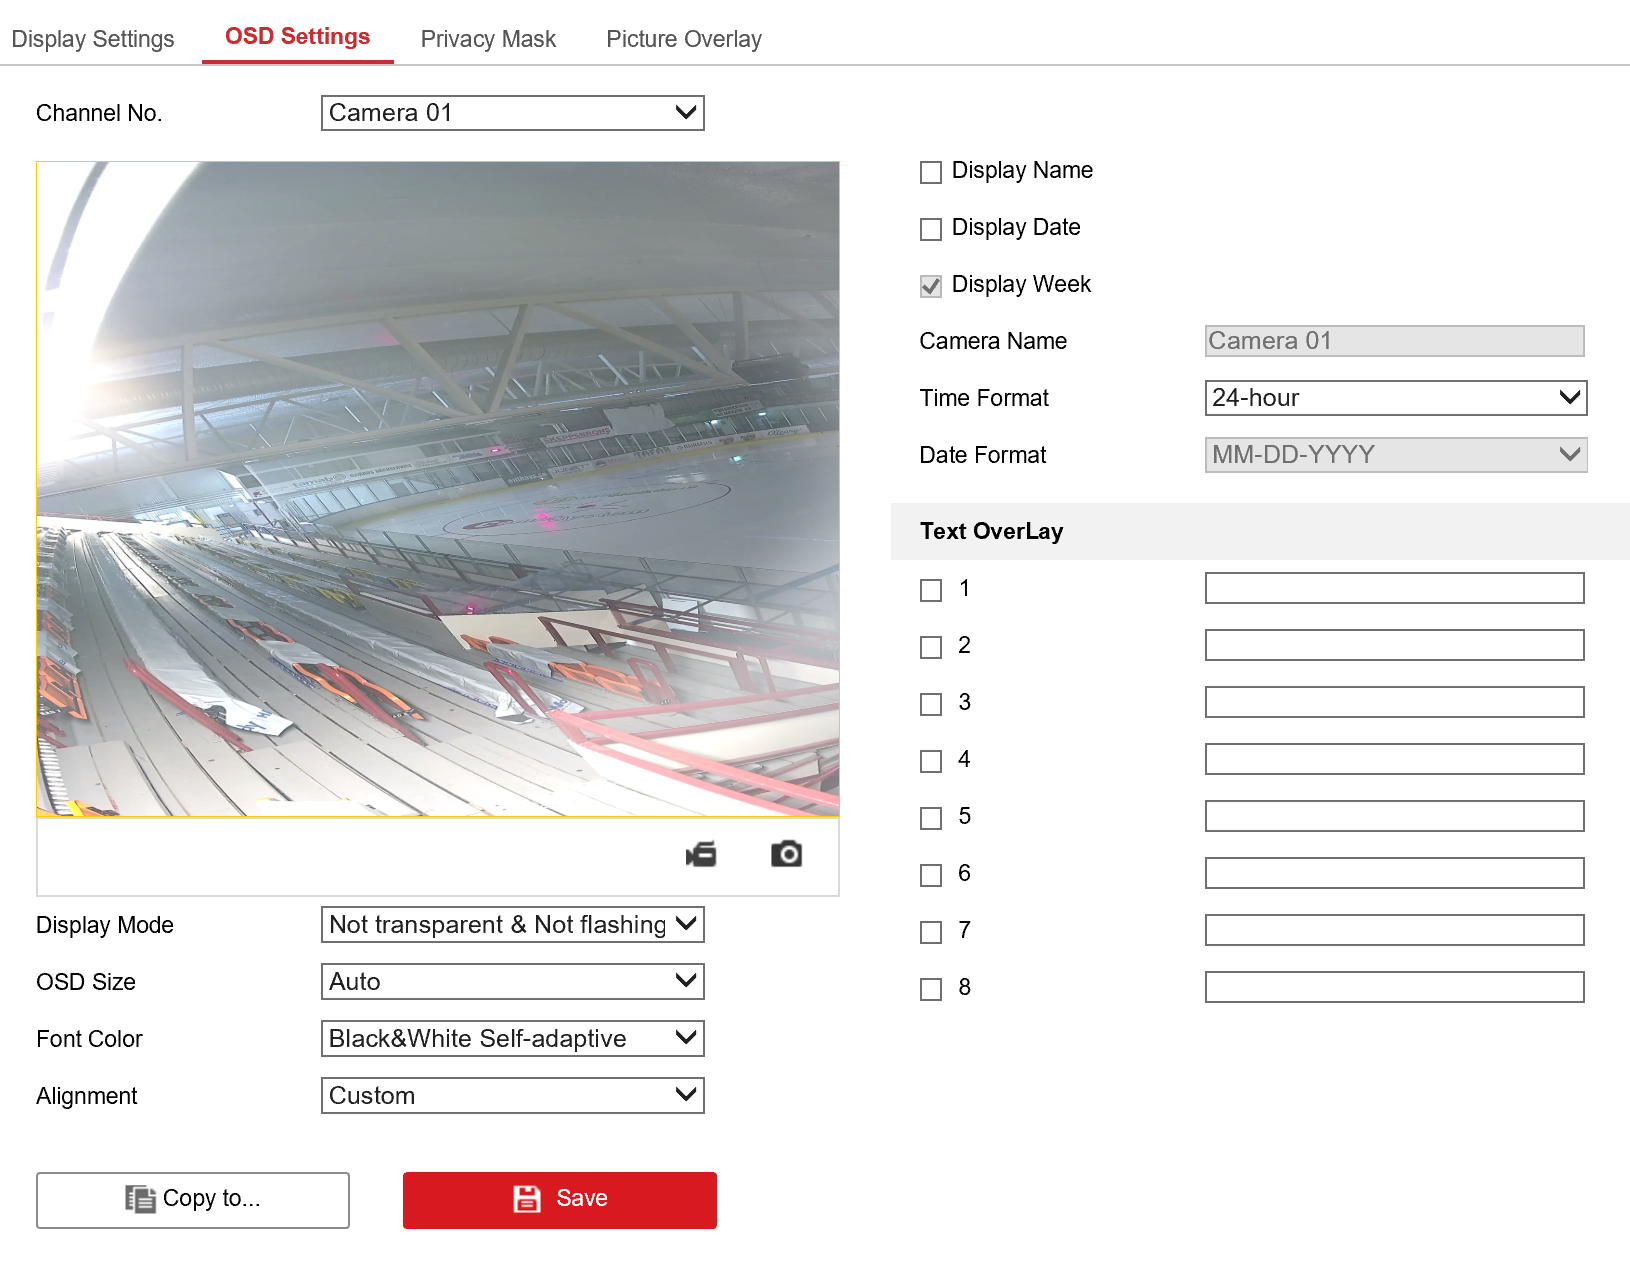
This has to be done for camera 01-04
Network settings
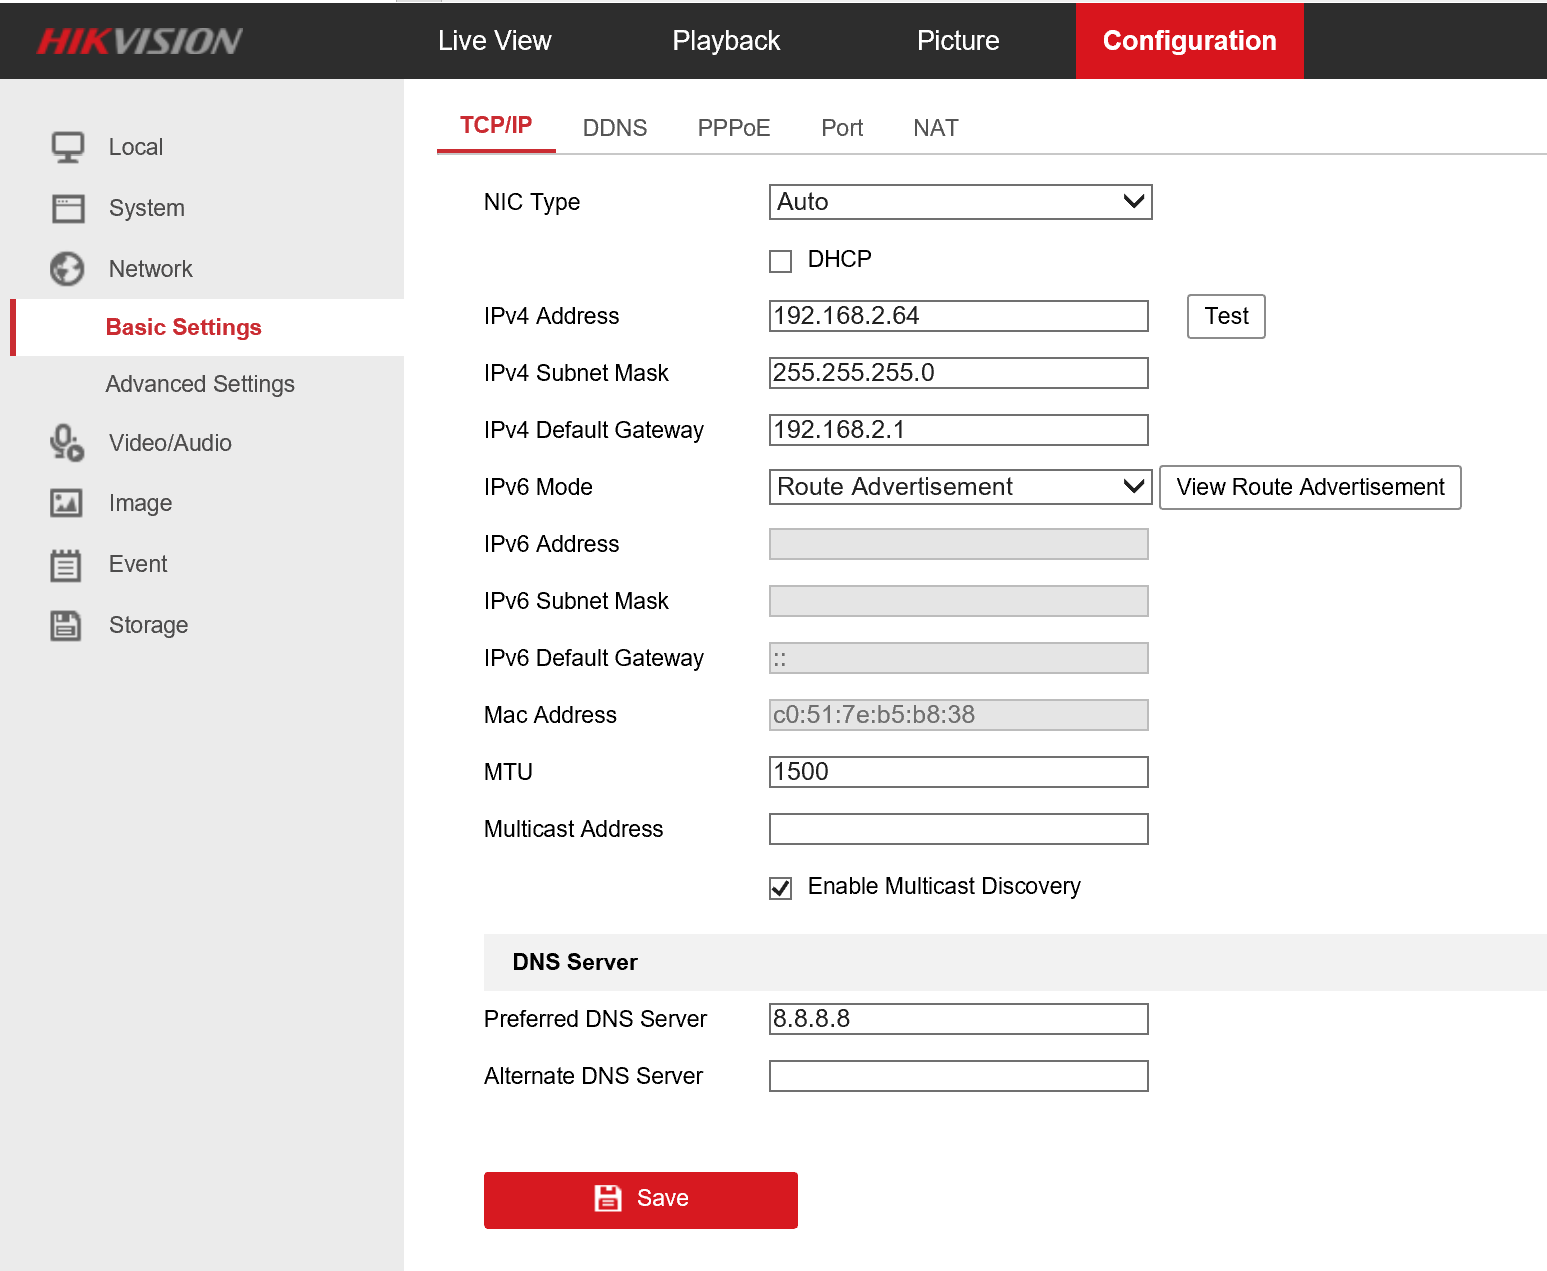
Set the cameras IP-address to correspond to the camera setting of the Virtual director. The default IP-address should be 192.168.2.64. If the camera is not set to this address or if you have to use another IP-address you can change it under “Network> Basic Settings”
